Working with Actif3D SketchUp extension
This article guides you how to export and synchronize your 3D model from SketchUp to Actif3D.
We use Actif3D extension to do that. The extension will be installed automatically together with the Actif3D software.
Both the SketchUp and Actif3D applications must be running during the export.
1. Access the extension
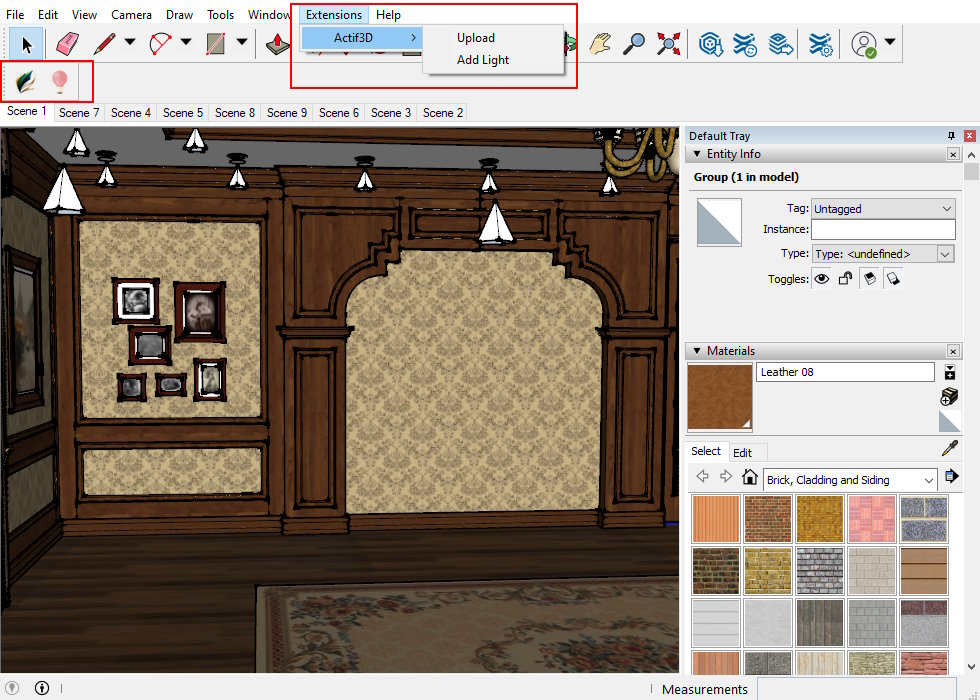
This is the screen of SketchUp with Actif3D plugin:
To export your 3D model from SketchUp to Actif3D follow these steps:
- Make sure the Actif3D application is running.
- Open the SketchUp model.
- Open the export dialog using the Export to Actif3D button from the toolbar or the Extensions → Actif3D → Export menu item.
2. Configure the export
This is the export popup:
sketchup_to_a3d_export_popup.png
Choose the options:
- Export type - Determines whether a new scene is created or an existing scene is updated.
- Scene name - The name of the scene in Actif3D.
- Include sun - If enabled, the SketchUp sun is exported. The sun shadows in Actif3D match SketchUp shadows.
Start the export and wait for it to finish. The exported scene is now added to the list of scenes in Actif3D.
model_imported.png
3. Synchronize data between SketchUp and Actif3D
After first time exporting to Actif3D, you may continue changing some parts of the original model in SketchUp.
By default, all exported data will bee updated in Actif3D every time you re-import the scene in Update type.
However, you may also want to change some object attributes of the model directly in Actif3D and want to keep the changes from overwriting through next export time. Actif3D allows you to do that, by marking the attributes are “broken” from the synchronization.
For example, in order to change the Opacity of a materials, you need to first unlock the imported opacity value by clicking the 🔗 icon in the Materials setting window. This will unlink this value from the original SketchUp settings.
