Add material settings to scene
1. Configure the transparent materials
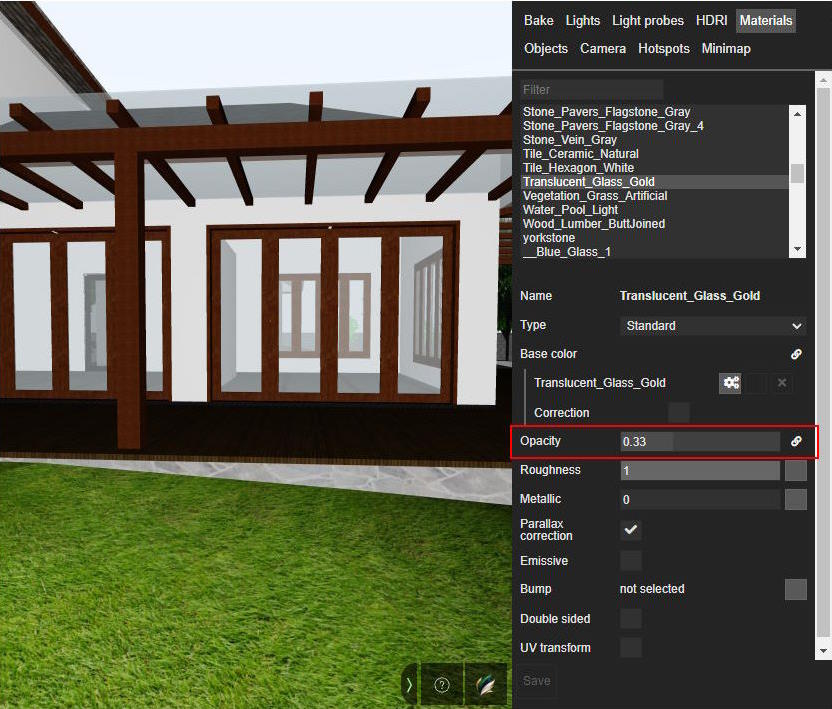
In the Materials tab set value of the Opacity for each transparent material, a value closer to 0 makes it more transparent. For example, the windows's glass should allow the outside light to enter the interiors.
In order to change the Opacity of the materials, you need to first unlock the imported opacity value by clicking the 🔗 icon. This will unlink this value from the original 3D modeling software settings. Unlinked values are not overwritten when a 3D model is updated.
2. Configure reflective materials
2.1. Add a Light probes to scene
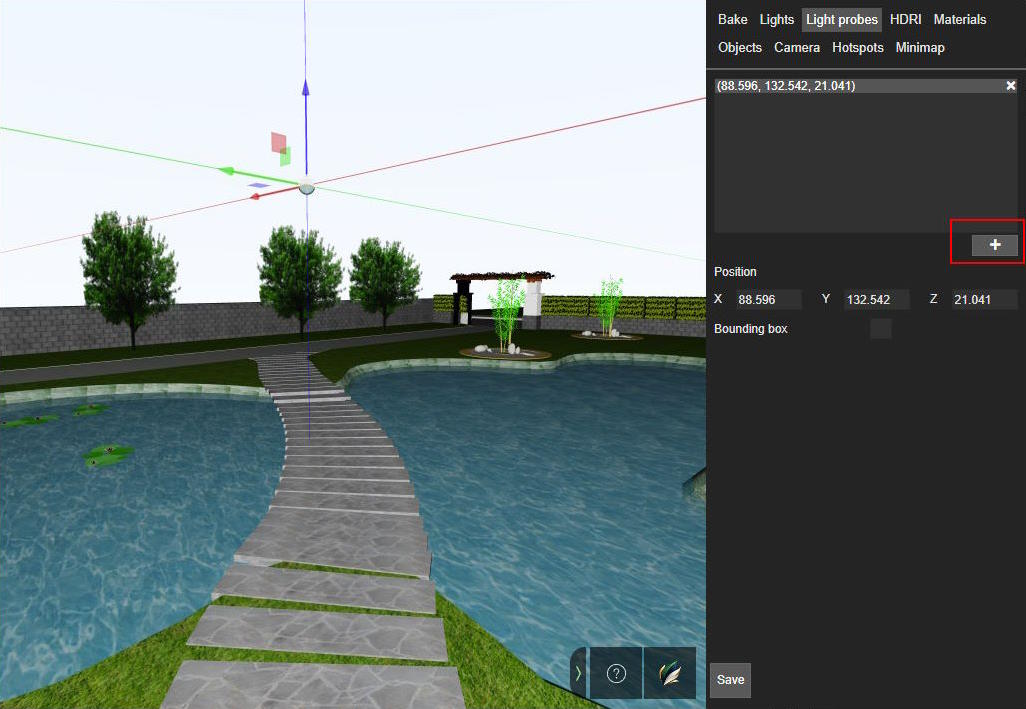
A Light probe capture and use information about light of its surroundings. It is necessary to generate reflections in nearby objects like water, glass…
Now go to the Light probes tab, add a Light probe in the air above the outdoor water pool.
When you model use SketchUp plugin to export scene, Actif3D tries to automatically detect rooms where light probes should be placed. If this automatic placement works for your scene, the Light probes tab will show the Light probes that were added automatically and you can skip this step. Sometimes you have to do it manually.
2.2. Configure reflective materials
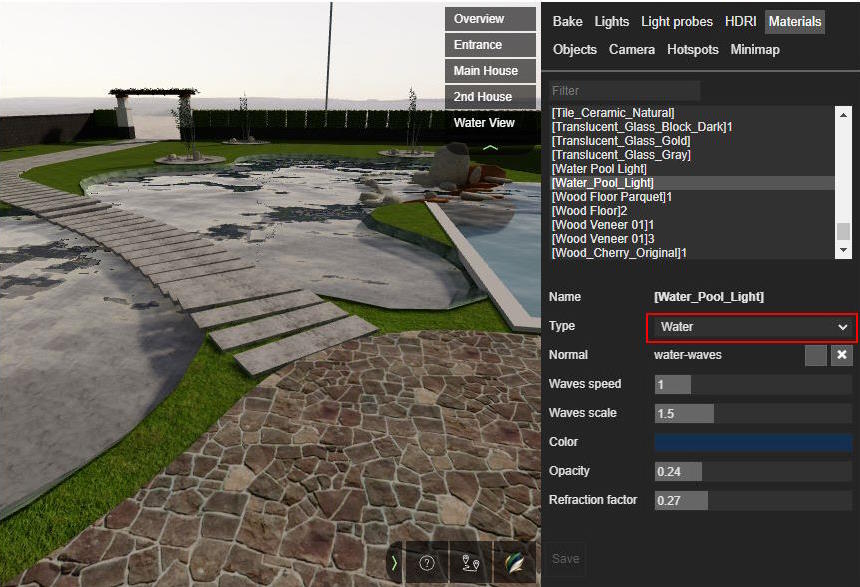
Switch to the Materials tab. Select an object in the Player area, its material becomes highlighted in the list of materials, and the material settings will be displayed in the right site panel under the Materials tab.
Now select the water object in the Player area, and change the material type to “Water”. Then you can see the water effect applied to the object.
There are two properties that define how each material reflects light: Metallic and Roughness. Use Metallic to define if a material is made out of metal; use Roughness to define how smooth the surface is.
You can change the Metallic and Roughness value and see the effects. Try with several value sets to have best setting.
Next lesson: Hotspots & Views


